

How To Draw A Lion Face
This step by stride tutorial shows how to depict a king of beasts's face up and head going from a basic shape sketch to a finished line drawing.
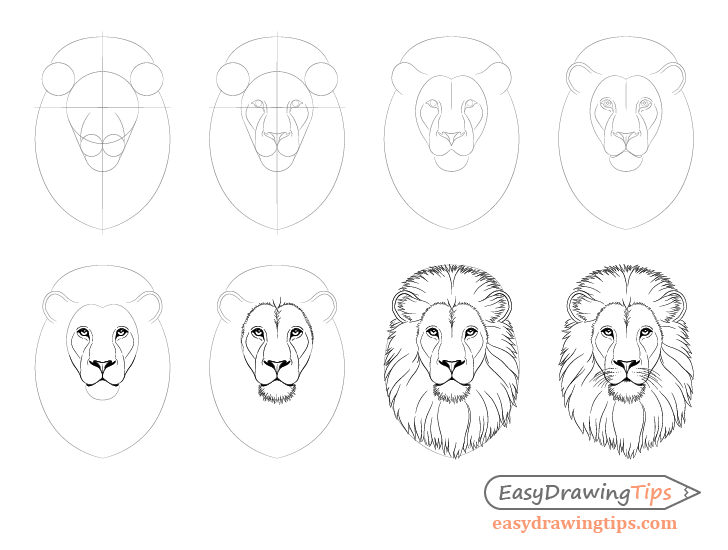
Equally a lion'due south face is fairly complex this is a very detailed tutorial with many steps. If you are going to be following along using pencil and paper please be sure to brand low-cal lines for the initial steps of the cartoon so that yous tin can easily erase them later.
Footstep 1 – Draw the Major Shapes of the Lion's Face & Head
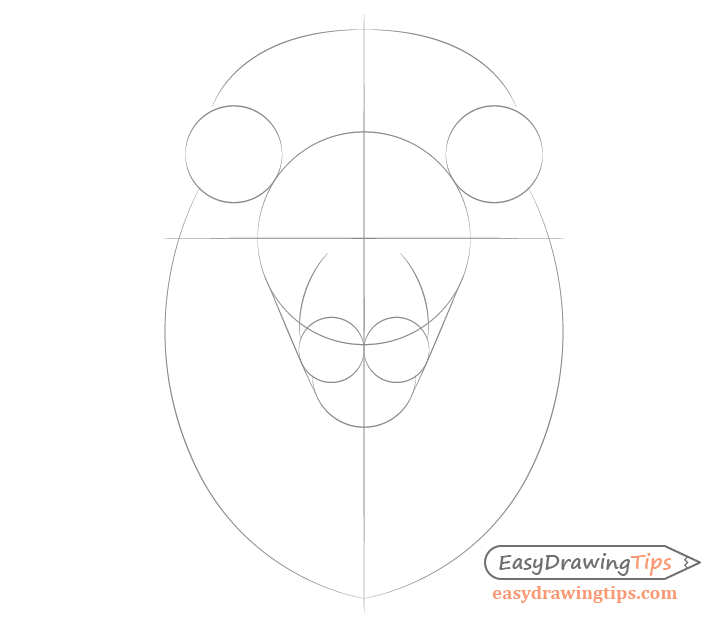
Commencement the drawing of the lion's face by first breaking it down into more bones shapes.
For an explanation of why you should draw this style see:
Beginner Guide to Learning to Draw
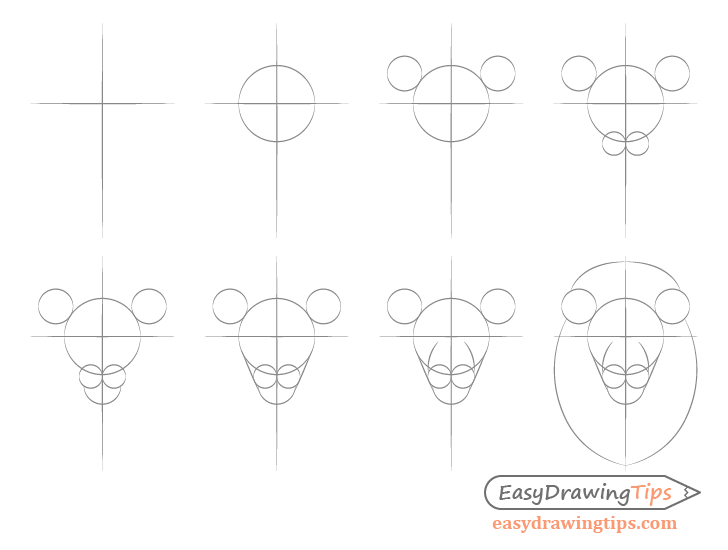
Construct the king of beasts's head equally in the instance in a higher place:
- Draw a directly vertical line through the middle of your drawing area followed past an intersecting horizontal line towards the upper terminate of the kickoff line
- Make a circle effectually the intersection to become the rough width and shape o the upper part of the head
- Draw 2 circles to signal the basic shape and size of the ears
- Towards the bottom stop of the big face circle draw 2 more circles (slightly overlapping the large i) to represent the stop of the snout
- Draw a one-half circle below the 2 "snout" circles (slightly narrower in with) for the bottom jaw
- Projection a gear up of lines from the big face up circumvolve towards the bottom jaw half circle to deed every bit construction lines
- Depict 2 curves staring from slightly beneath the horizontal line towards the "snout finish" curves to create construction lines for the snout
- Draw the outer shape of the mane every bit two sets of curves
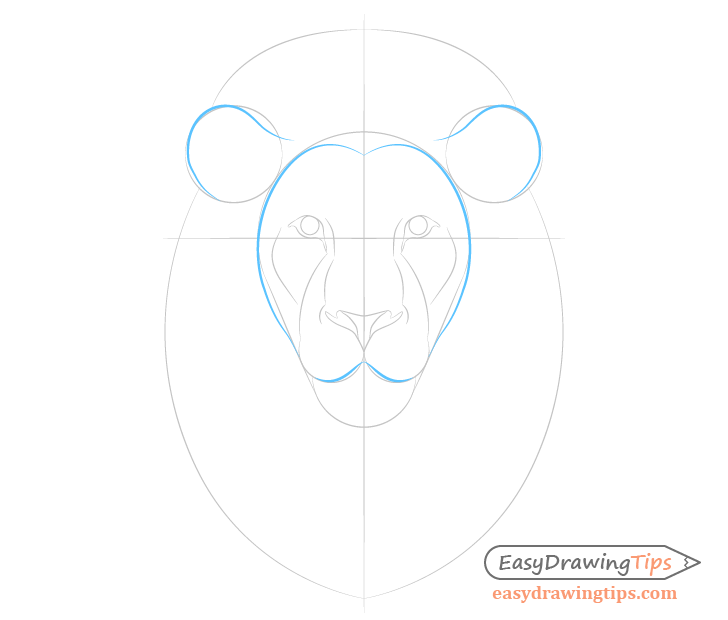
Stride 2 – Draw the Facial Features
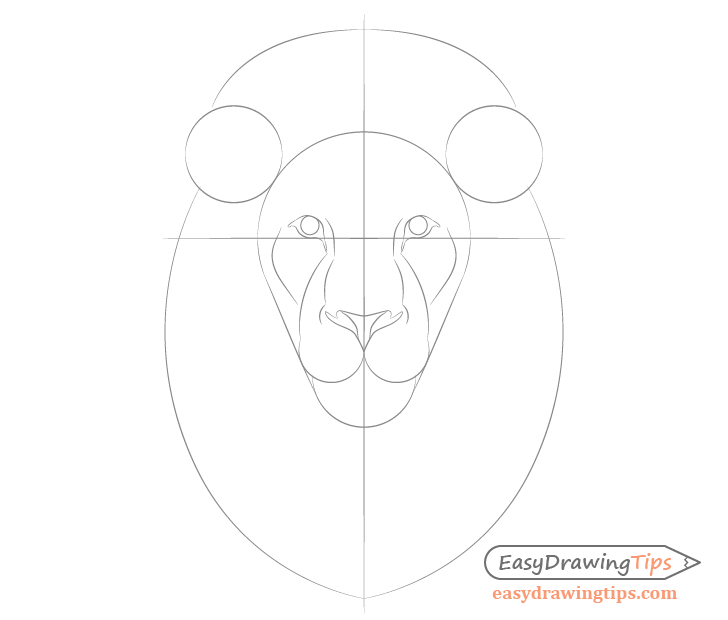
Describe the basic shapes of the major facial features and erase some of the construction lines from the previous step so that your drawing does not become cluttered.
Add cheek bone shapes on the sides going from the area effectually the outer corners of the eyes and somewhen curving inwards towards the nose.
Side by side add more details of the snout area starting from some pocket-size curves around the nose to the larger curves that kickoff go inwards and then outwards around the eyes.

Draw he eyes directly above the horizontal line (with the inner corner going below the line) from stride 1 with the shape as in the in a higher place example.

Draw the shape of the nose as the instance to a higher place.
Footstep three – Refine Shape of the Face
Now refine the outer structure lines of the face from footstep one to a more precise shape of the lion's head.

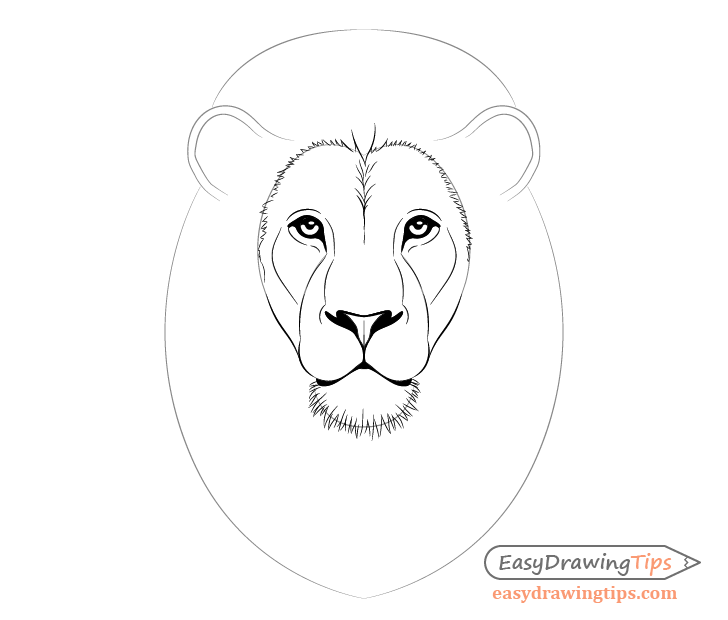
Stride iv – Draw the Smaller Details of the Face up
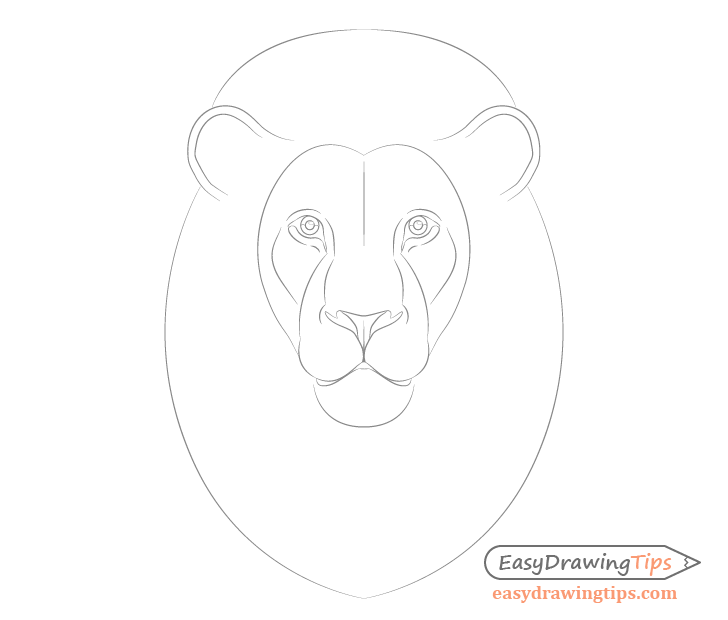
Now piece of work on the smaller details of the king of beasts's face.
Add the inner curves of the ears pretty much following the outer curves.
Draw the bottom part of the oral fissure with the outer corners sort of "hanging downwardly".

Add together the educatee, reflection area and indicate the upper shaded area within the centre. Also draw the curves of the upper and lower eyelids as in the above example.
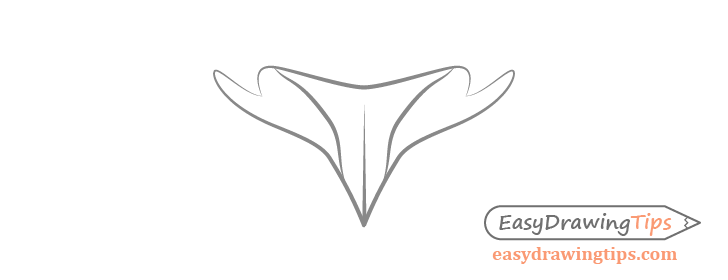
Add a tiny "split" towards the bottom of the nose as in the in a higher place example.
Stride 5 – Add Some Basic Fill/Shading
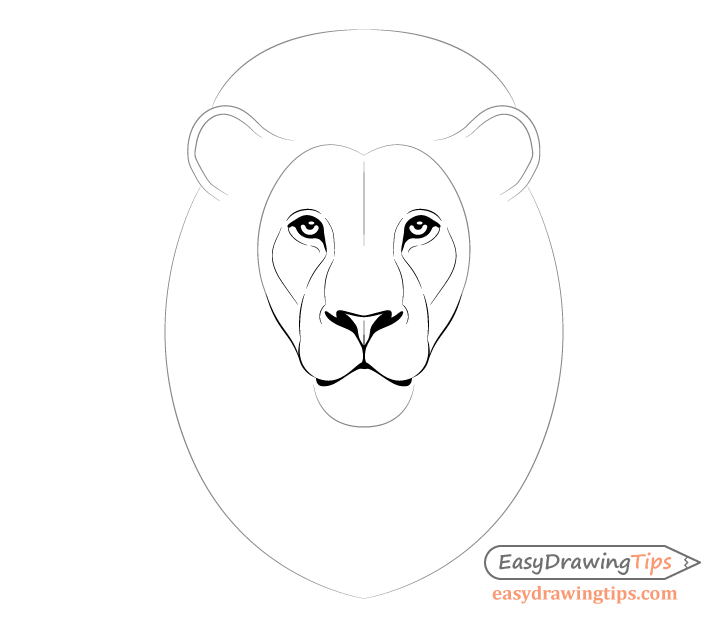
Fill in/shade the areas of the optics nose and mouth as in the in a higher place instance. You can also start going over some of your light sketch lines with a more solid stroke to finalize the drawing.
Footstep 6 – Draw the Inner Mane & Mentum Fur
Describe the inner function of the mane fur every bit well the fur on the mentum.
You tin pretty much indicate each little fur clump with just one or two lines. Endeavour and brand each dodder of slightly different shape, size and length to brand the fur look natural.
Footstep vii – Draw the Mane
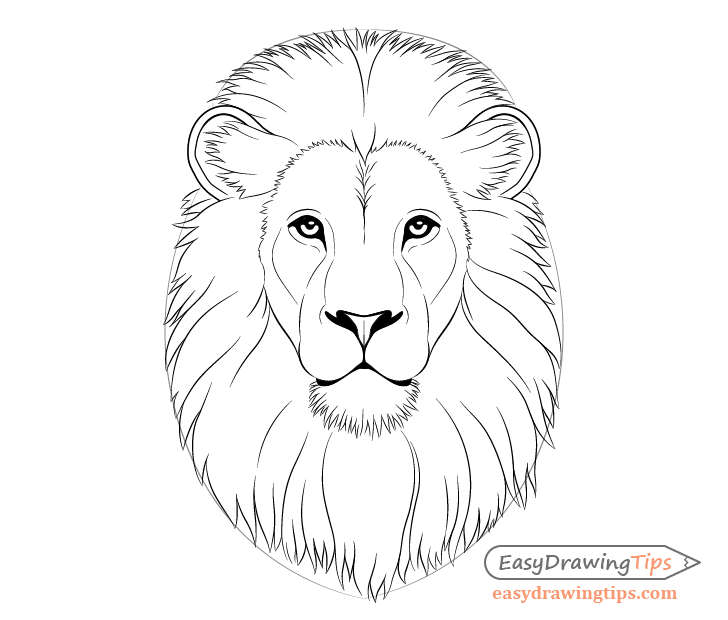
Draw the residual of the lion's mane. Mostly the fur clumps will be smaller around the top expanse and larger around the bottom where the fur is longer.
Step 8 – Draw the Whiskers
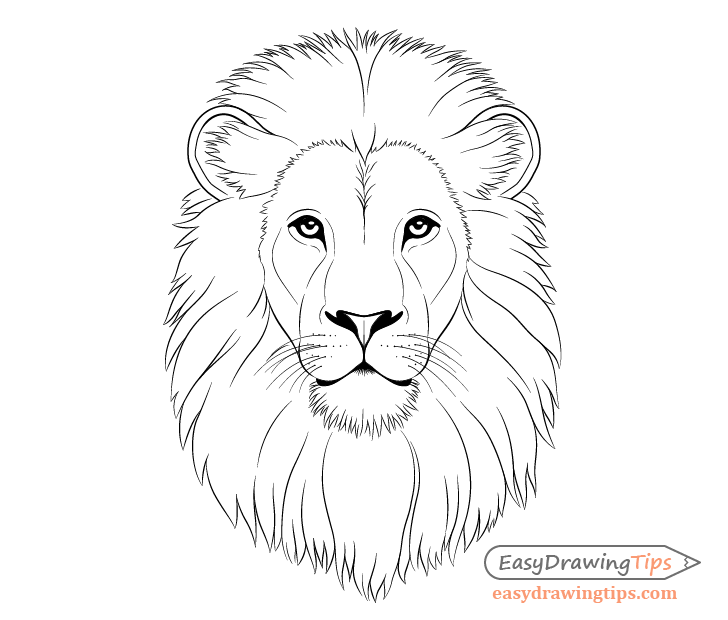
Finally add some whiskers to finish the drawing.
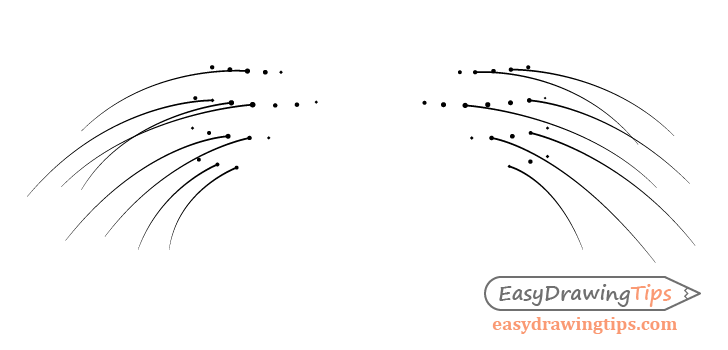
Lions generally accept a set of tiny black dots around the upper expanse of their mouth that the whiskers grow out of. Draw a few rows of these before drawing the whiskers.
Draw the whiskers thicker towards the base and thinner towards their outer tips. Also be certain to describe them of various length and curving in slightly unlike directions to brand your cartoon await more natural.
When the whiskers are done yous should have a finished line cartoon of the king of beasts's head.
Determination
A lion's face up and head can exist very complex to describe but you lot tin can make it easier by first breaking it down into more than bones shapes and and then refining your drawing stride by stride down to the smaller details.
For cartoon the full body of a lion from the side view come across:
How to Describe a Lion Full Trunk Step past Step
For other like tutorials see:
- How to Describe a Wolf Face up & Head Step by Pace
- How to Draw a Tiger Face & Head Step past Pace
- Dog's Head Front View Drawing – Pace by Step
- How to Draw a Fox Stride by Stride

Source: https://www.easydrawingtips.com/how-to-draw-lion-face-head-step-by-step/
Posted by: stormplacrour.blogspot.com
0 Response to "How To Draw A Lion Face"
Post a Comment